This pattern was originally published BirDeli's Handmade and it was posted on that blog. Sadly, the blog is no longer available so I copied the pattern from a web cache. I take no credit for this pattern. It belongs to BirDeli. I am only putting it here for posterity, since it had been made available there, for free, for all.
Skill Level: Easy
Size: Fits all size heads. (Stretchy)
Materials: 10 mm (US N-15) hook, Category 5 Bulky weight yarn (approx 100 gr/110 m; 60% Wool yarn, 40% Acrylic yarn), 1 button (4 cm diameter), scissors, yarn needle.
Stitches Used: Chain stitches (ch), stitch (st), slip stitch (sl st), single crochet (sc), half double crochet (hdc), double crochet (dc).
Note: Hat is worked in spiral shapes from top to end of Rnd 8. The rounds are not joined and restarted and they are worked continuously.
Instructions
Center Ring: ch3, sl st into first chain to create a ring or you can do a magic ring.
Rnd 1: ch 1, work sc, hdc, 6 dc in ring. Do not join the round. (8 st)
Rnd 2: Work 2 dc into the first st (mark the first of these two stitches with a marker to indicate the beginning of the second round), 2 dc in next 7 st. (16 dc)
Rnd 3: *2dc in next dc, dc in next dc* Repeat from * to * around, reach the marker. (24 dc)
Rnd 4: *2dc in next dc, dc in next 2 dc* Repeat from * to * around, reach the marker. (32 dc)
Rnd 5: *2dc in next dc, dc in next 3 dc* Repeat from * to * around, reach the marker. (40 dc)
Rnd 6: dc in each dc around, reach the marker. (40dc)
Rnd 7: dc in each dc around, reach the marker. (40dc)
Rnd 8: dc in each dc around and turn. (40dc).
Row 9: ch 2 and dc in same stitch, dc in next 15 dc, hdc in next 11 dc, sc in next 7 dc, sl st in next 6 dc, turn. (16 dc, 11 hdc, 7 sc, 6 sl st)
Row 10: sl st in next 8 st, sc in next 8 st, hdc in next 10 st, dc in next 14 st, turn. (14 dc, 10 hdc, 8 sc, 8 sl st)
Row 11: ch 2 and dc in same stitch, dc in next 11 st, hdc in next 11 st, sc in next 8 st, sl st in next 6 st. Fasten off and weave in loose ends with the yarn needle. (11 dc, 11 hdc, 8 sc, 10 sl st)
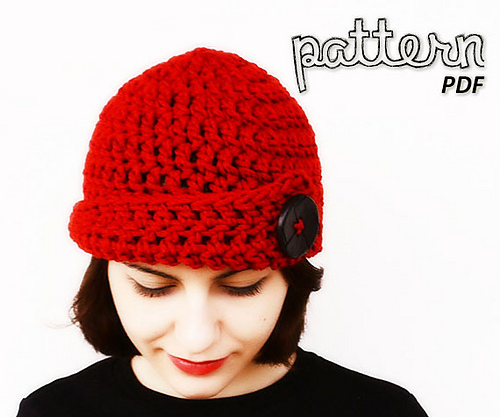
Sewing the button
Align the edge and the longer side of the brim to the row markers and fold to sew the button like in the picture.